Nail Art: Revlon Sun Candy in Shimmering Sunset

Revlon Sun Candy in Shimmering Sunset
Revlon is releasing a new line of double ended nail art products called 'Sun Candy' - this is a bright pink polish and a matching jelly with flaky glitters. Obviously, as lovers of all things pink and glitter, this was right up our alley. 
We frequently get asked how to do a glitter gradient - and the answer is that a glitter gradient takes patience and a building up of thin coats. This is the perfect glitter to practice with! You cannot go wrong and as long you use thin layers, this will end up looking great!

Glitter Gradient using Revlon Sun Candy in Shimmering Sunset
For this look, we used two coats of the pink creme polish and three super thin layers of the glitter polish, starting with half of your nail from the middle to the tip, and getting closer to just the tip with each glitter layer.

Hopefully this is a helpful way for anyone scared of going for a glitter gradient to step outside of their comfort zone!

Disclaimer: Some products may have been sent to us by the company/PR in exchange for our honest opinion and review.

Valentine's Day Conversation Hearts!

We're continuing to get in to the Valentine's Day Spirit - and what better way than nail art featuring some of our favourite Valentine's Day candy? Let's be honest... candy may be the best part of Valentine's Day. We decided on a Conversation Heart-themed mani featuring some of our favourite Lime Crime pastels, a Nicole by O.P.I. nude (That's Putting it Mild), and the Nicole by O.P.I. matte top coat.

To achieve this look, we hand-painted all the art, and then topped it all with a coat of the Nicole by O.P.I. Quick Dry top coat (quite useful since we are extremely impatient...). Finally, we used a nail art brush to selectively apply matte top coat only to the hearts, giving them a more chalky, true to life appearance.

What do you think of this look?

Dislcaimer: Some of the products used may have been provided by the company/PR in exchange for our honest opinion and review.

Nail Art: O.P.I. Brazil Gradient Manicure

O.P.I. I Just Can't Cope-Acabana, Where Did Suzi's Man-Go? and Toucan Do It If You Try

When we saw the bottle shots of the O.P.I. Brazil collection for Spring/Summer 2014 we had a moment of tropical excitement - despite braving temperatures in the negatives in chilly Canada. We consistently look for polishes lacking in our collection, and orange and yellows always top that list. After using the yellow polish, I Just Can't Cope-Acabana, we can totally confirm that it is the perfect creme yellow for our nail art needs. If you are starting to get in to nail art or looking to do a rainbow design and lacking a yellow - you need this. If you are looking for bright, punchy orange and orange-y pinks, the other two polishes are for you! 

We used a sponge with some topcoat on it (to prevent absorption of the gradient polishes) and sponged 4 coats on with no base coat. The coverage is pretty amazing for four sponged coats, we are definitely impressed. If these polishes are any indication of what the whole Brazil collection will be like, we will definitely check out a few more! We cleaned up the mani using acetone and a nail art brush, and topped it off with an O.P.I. top coat. 


What do you think of this mani? Would you wear this bright gradient in the hot weather?

Disclaimer: Some of these products may have been provided by the company/PR in exchange for our honest opinion and review.

EASY Glitter Gradient Video Tutorial


Hey guys! Check out our glitter gradient tutorial using O.P.I. Toucan Do it if You Try, Snowflakes in the Air and Essie Hors D'Oeuvres - let us know what you think of the look in the comments below!

Nail Art: Glitter Placement ft. Nicole by O.P.I. Be Awesome

When we saw that Nicole by O.P.I. was releasing some new permanent shades for 2014, like all completely normal nail polish-addicted people we hoped for an amazing glitter polish. Thankfully, the glitter gods (or goddesses?) smiled upon us, and Be Awesome was bestowed upon us - or at least something as magical as that happened.

We proceeded to do an accent nail with this technique and some of the other new colours - then we took that off and got a little bit crazy and decided to do every nail. In all its glory, our full mani using this glitter is below. Note that if you decide to do this, you may use a quarter of the bottle of polish as we shamelessly did - but it was worth it.

Glitter Placement Nails using Nicole by O.P.I. Be Awesome
What do you think of this mani? 


Disclaimer: Some of these products may have been provided by the company/PR in exchange for our honest opinion and review.

Nail Art: New Nicole by O.P.I. Permanent Collection Additions!

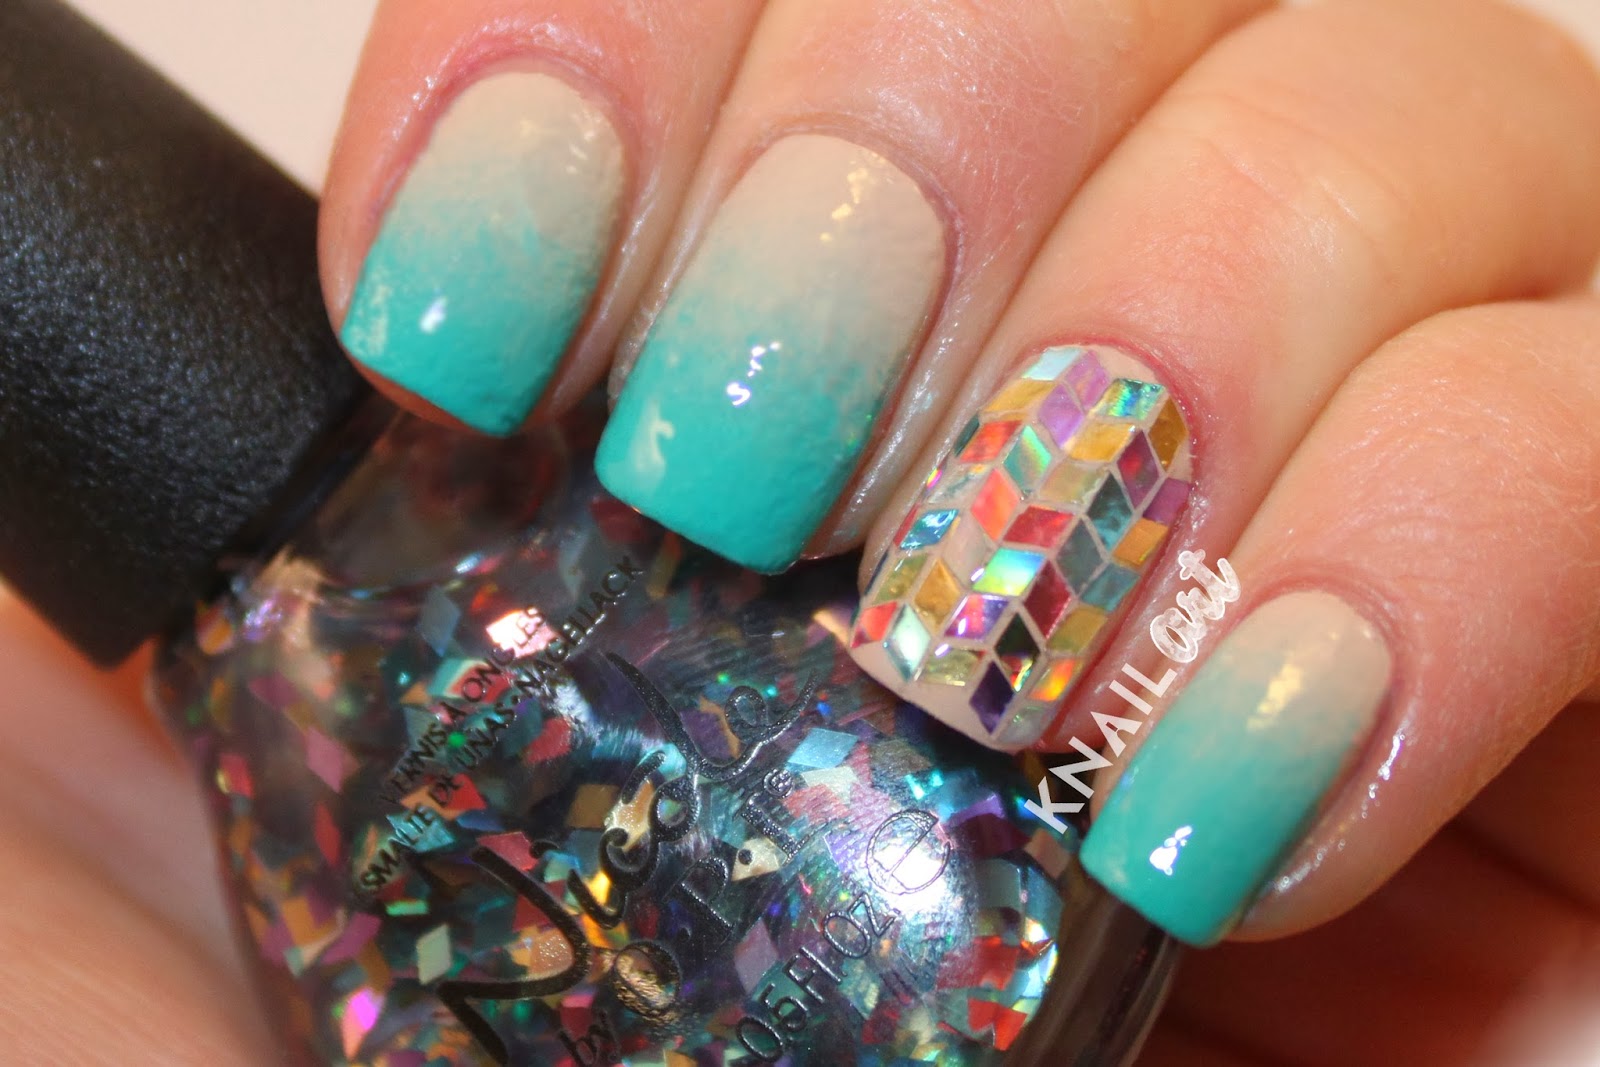
Nicole by O.P.I. has released some new additions to the permanent collection, and we could not be loving their choices more! We decided to try a nude to teal gradient using Teal Me Something New (the teal!) and That's Putting It Mild (the nude!). We have to say, we absolutely love this nude colour. It is the perfect beige and we love how it looks on our nails. The teal colour is going to be absolutely perfect for spring and summer, we cannot wait to start using it in some brighter manis! 

The real showstopper here is the glitter though, called Be Awesome - and that it is! We have been searching for a glitter polish like this for ages, and even considering going for the loose glitter option, but this polish has come to the rescue! It makes the chevron patterned accent nail super easy and totally sparkly! Check out the nail art we did with these polishes below, and stay tuned for some more nail art using Be Awesome!


Disclaimer: Some products have been sent to us by the company/PR in exchange for our honest review and opinions.

OPI x Gwen Stefani Nail Art Kit ft. Over & Over A-Gwen and Swarovski!


The Gwen Stefani for OPI signature shade was released in a kit including some Swarovski elements and as hard as we tried to resist making a joke about it being bananas - this kit is bananas. The shade is the perfect Gwen red (as to be expected) and the nail art supplies have a rock and roll twist that would mesh with any of the polishes in the collection.

The box is beautiful on its own, we can't ever get enough red.


The kit comes in a large box which includes the shade Over & Over A-Gwen, along with a tiny nail art glue, and 5 different Swarovski elements. Also included is a little nail art guide which contains suggestions for art using the whole collection of Gwen for OPI polishes. The contents of the box are pictured below!
The Nail Art Glue, Swarovski elements, and Nail Art Idea book!
Over & Over A-Gwen
 Finally, after much anticipation and a little drooling, we got to work. The Over & Over A-Gwen polish is a gorgeous orange-y red that leans to a jelly finish. It is ultra-shiny (the look is topcoat-free with two coats) however there is a tiny bit of visible nail underneath. We used the tiny gold buttons and larger diamond studs and we love how it turned out.

Our finished nail look ft. OPI Over & Over A-Gwen and Swarovski elements.


Disclaimer: These products were provided by the company/PR in exchange for our honest opinions and review.