Showing posts with label yellow. Show all posts

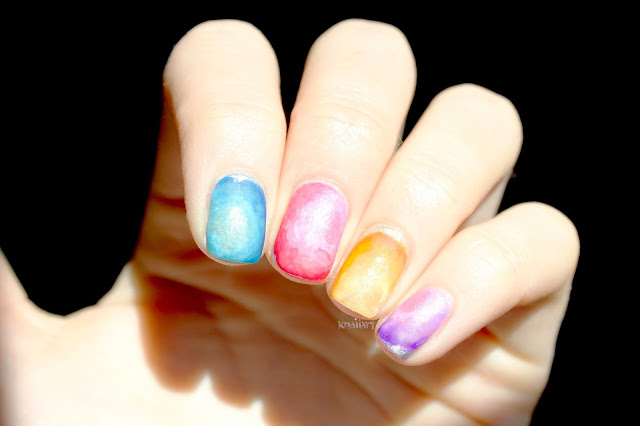
Nail Art: O.P.I. Brazil Gradient Manicure

O.P.I. I Just Can't Cope-Acabana, Where Did Suzi's Man-Go? and Toucan Do It If You Try

When we saw the bottle shots of the O.P.I. Brazil collection for Spring/Summer 2014 we had a moment of tropical excitement - despite braving temperatures in the negatives in chilly Canada. We consistently look for polishes lacking in our collection, and orange and yellows always top that list. After using the yellow polish, I Just Can't Cope-Acabana, we can totally confirm that it is the perfect creme yellow for our nail art needs. If you are starting to get in to nail art or looking to do a rainbow design and lacking a yellow - you need this. If you are looking for bright, punchy orange and orange-y pinks, the other two polishes are for you! 

We used a sponge with some topcoat on it (to prevent absorption of the gradient polishes) and sponged 4 coats on with no base coat. The coverage is pretty amazing for four sponged coats, we are definitely impressed. If these polishes are any indication of what the whole Brazil collection will be like, we will definitely check out a few more! We cleaned up the mani using acetone and a nail art brush, and topped it off with an O.P.I. top coat. 


What do you think of this mani? Would you wear this bright gradient in the hot weather?

Disclaimer: Some of these products may have been provided by the company/PR in exchange for our honest opinion and review.

Geo Nails


We've been dying to try these nails since we first saw them all over instagram, but we couldn't find a colour match we were in love with enough to really go for it - until we decided on these. Essie's Bikini So Teeny, available here, and Nails Inc. Sumner Place, available here.

We started with Essie Bikini So Teeny on all nails (except the ring finger and thumb, which we inverted to Sumner Place), then used striping tape to make a perfect line up the middle of any fingers we wanted this design on. We then used a nail art brush to brush on an angled line starting from the middle of the nail in the centre, to about 3/4 to the cuticle on the edge. We then 'filled in' the bottom half with the opposite colour, and allowed the polish to dry before peeling off the striping tape. Finish with some topcoat, and you're done!


This mani was quick and easy, definitely a good first attempt at working with striping tape. More striping tape mani's on their way in the future...

Flower Pattern Nails

Flower Patterned Nails


Why we love these:

These nails are super simple, and classic! They don't require a high skill level or any specific tools, and the colours can be varied endlessly. For a simple, chic design that is easy to paint and wear - this is the answer!

What you need:

  • Black Polish (we used Essie Licorice, buy it here)
  • White Polish (we used OPI Alpine Snow, buy it here)
  • Yellow Polish (we used Misa Hanging With the Girls, buy it here)
  • Silver Glitter Polish (we used China Glaze Glistening Snow, buy it here)
  • Base Coat and Top Coat (we used Essie, buy the top coat here, and base coat here)

What to do:

  1. Start with clean, dry nails. Paint each nail with a base coat.
  2. Paint two coats of a high shine black polish (navy blue works well too!) on each nail.
  3. Using the brush attached to your white nail polish lid (no separate brush required, although it may be helpful for smaller flowers) make 5 dots in a circle, and drag inward to the centre of your circle. Repeat these circles on each as many times as you can fit - we averaged about 3 flowers a nail. For a less uniform look, vary sizes of each circle. 
  4. On top of the white areas, use a sliver/white glitter. This step can be omitted for a more plain floral pattern.
  5. Using yellow polish, make a small dot in the center of your white 'petals', completing your flowers.
  6.  After ensuring your nails are dry, paint a layer of top coat (dont miss your tips!) and allow your nails to fully dry!