Showing posts with label nails. Show all posts

Festival Style: Crystal Geode Nail Art

Matte Crystal Geode Nails by knailart
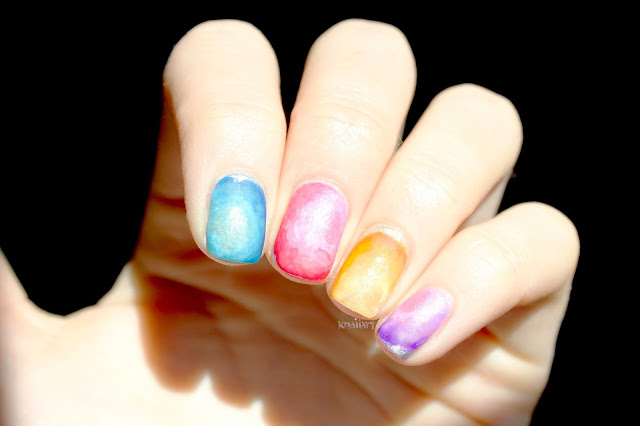
These matte crystal geode nails are the perfect festival season accessory! We started with a silver sparkly base around the edges, and a clear sparkly base on the rest of the nail—perfection isn't required! After that, we used a thin coat of OPI's Sheer Tints to start off each nail followed by various similar shades from lightest at the inside of each 'crystal' to darkest at the edge of the silver shade. We dripped some acetone over the nails (and blew dry!) before finishing with top coat to get the finished smoky look.

Crystal Geode Nails by knailart


 We love how these look matte, but they are much more realistic when left shiny. Let us know if you try something like this out, and happy polishing!

Fresh Fun Rainbow Nail Art for Spring!

Rainbow Nails for Spring!
 Spring is here and we've taken some inspiration from the copious of mini eggs we've consumed (as pictured above). We used 8 different colours with a pastel and bright shade of each to create this fun look!

A close up of our Rainbow Nails for Spring!

DIY: Plan your nail art with the knailart nail art template!

Check it out! We created this template to plan our nail art and keep track of the polishes we're using. 

Print this out and write down the polish names, add a quick swatch, and sketch or draw on your designs! We've included it here as a photo file that you can save and print, or you can download the larger pdf version here!


Share your creations with us on Instagram with the #knailart!

THE BEST NEON NAIL POLISH: Tie Dye Nail Style

Neon Tie Dye Nails with TNA Clemente Shorts, Pandora Heart Ring and Dotted Ring, and Tiffany and Co. Sterling Silver Infinity Ring 
With so many amazing neons coming out recently, we decided to revive our favourite summer style and show you how we wear our tie dye nails! Our updated list of the best neon polishes is below, and the video tutorial is available on our YouTube here.

THE BEST NEONS FOR NAIL ART:

Yellow - Orly Glowstick
Green - Models Own Toxic Apple


If you have any great neon polishes, let us know in the comments so we can put them to the test!

Disclaimer: Some polishes used were received from the company/PR - however, our opinions are our own. This post contains no sponsored links!

TUTORIAL: Holographic Glitter Polka Dot Nails

YSL La Laque Couture in Noir Primitif with Holographic Glitter Polka Dots
We love how quick and easy this look is! Check out our YouTube tutorial to get the details! The glitter is from www.BornPrettyStore.com and is available here in option #1! Feel free to use code 'KNAILART' for 10% off!


Happy polishing!

TUTORIAL: Purple Floral Heart Accent Nail (Perfect for Mother's Day!)

Purple Floral Heart Accent Nails - pictured: Maybelline Color Show in Lust for Lilac
Today we're sharing with you a YouTube tutorial we made for our purple floral heart nails! Polishes that we used include:

Base: Maybelline Color Show - Lust for Lilac
Flower Petals: China Glaze - Spontaneous
Flower Centre: China Glaze - White on White
Flower Dots: O.P.I. - Push and Pur-Pull
Lighter Purple (between flowers): Quo by ORLY - Sweet Blush
Leaves: Revlon - Lime Basil
Glitter: O.P.I. - Desperately Seeking Sequins
The nail art brush we used is the medium Berkeley nail art brush, and can be found here (not an affiliate link - just sharing!)


Happy polishing - and remember to let us know if you try this out!

NOTD: Floral Peace Heart Nails (Motavator Logo!)

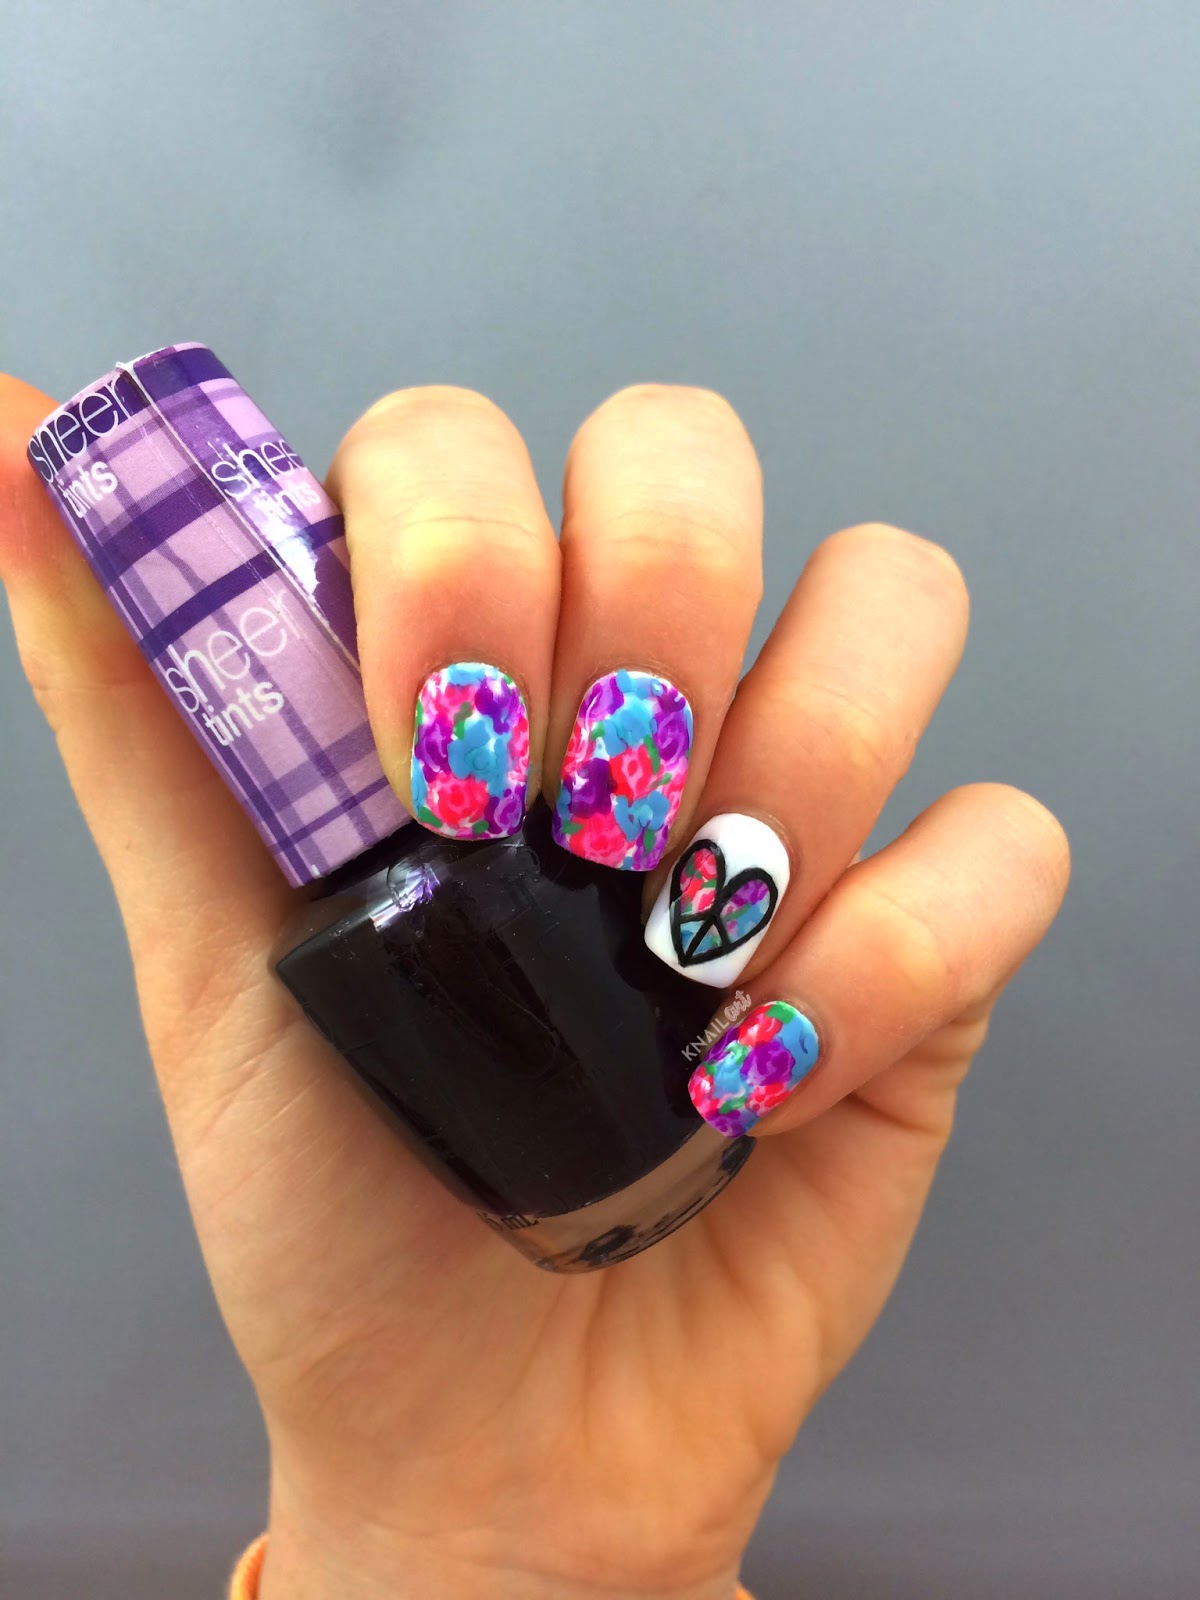
Floral nails ft. Peace Heart accent nail!
For today's nails we are in full spring spirit with some easy florals and a peace heart on the accent nail (this is also the Motavator sign - a logo used by youtube guru Bethany Mota)!

Our white base is our go-to China Glaze White on White. We used O.P.I. Sheer Tints in Be Magentale with Me, I Can Teal You Like Me, and Don't Violet Me Down for the base of the flowers. Then we outlined the flowers with Revlon Ginger Melon, Revlon Tropical Rain, and O.P.I. Push and Pur-Pull. We used Revlon Lime Basil for some random leaves!

For the accent nail - we followed the same steps as above, but finished off the look with a white heart outline, and then used a detail brush to drawl the symbol on in Zoya Raven!

We sped up the accent nail for a quick tutorial video which we posted on our instagram and embedded below... Happy polishing - and if you try out this look be sure to tag #knailart so we can check it out!


NOTD: Spring Pastel Rainbow Tie-Dye!

Pastel Tie Dye Nails by knailart (Pictured: China Glaze At Vase Value)

We're back at it! A spring-time pastel tie dye is our obsession of the moment - and they may be pastel, but in the sun they look super vibrant! We used mostly China Glaze pastels from the City Flourish collection, including the pictured At Vase Value. If you would like to know more about how to achieve the tye-die look... check out our neon rainbow tie dye post here! Happy Spring!

Pastel Tie Dye Nails by knailart

Swatched: Essie Hide and Go Chic Spring Collection 2014

Today, as I type this in a snow squall, we have swatches of the new spring collection from Essie - Hide and Go Chic. This collection features 6 creamy shades with a focus on pastel blues and pinks. We actually didn't hate a single polish in this collection, but we are particularly enamoured with a few. So, here we go!

First up is Fashion Playground, a pastel green described accurately by Essie as 'pistachio'. This has the tiniest bit of shimmer, but if you're anti-shimmer it shouldn't bother you like past Essie shimmers have with larger silver glitter pieces. This swatch is two coats, and as you can see this polish has great opacity!


Next up is the headline polish of the collection, Hide and Go Chic. For some reason, we find this blue reminiscent of a greek vacation. This is a creme shade, and this swatch is two coats. Although this colour is unique in our collection, we love how original Fashion Playground is comparably. However, if you're missing a medium blue in your collection and feel like you need to fill that void, this is a great option.


This baby pink beauty is Romper Room, and it is literally the perfect pastel pink. We have a butter London pastel pink which was previously our go to - and it has been replaced. The formula on this is literally impeccable and we would recommend this to anyone, even if you already have a pastel pink in your collection. This will definitely get lots of wear this spring!


Next up is a nude marketed as 'semi-sheer' by Essie - Spin the Bottle. In three coats (in the swatch below), you get to opacity. Even with two coats however, it still has pretty good coverage for those who want to keep their nail lines private. We thought this worked well with our skin tone, but also think it would work well with a darker skin tone (however, lighter may be a no-go).


Next up is the bright of the collection - Style Hunter. This is a super bright 'crimson' (Essie's words) and the description of 'laser sharp' seems to be right on. This is definitely a statement polish, but we can see it working with spring florals really well! This is two coats, and application was flawless.


Lastly we have Truth or Flare, a 'vintage blue denim' - while we agree this polish has a vintage look to it, we wouldn't say denim. This polish fits well with the collection, but as you can see on the left edge of the pointer finger, coverage can be patchy if you haven't perfected flawless application. This is the one polish we would say to skip in this collection, but that said - in two coats, it does have a really nice shade that matches well with Hide and Go Chic for a potential two-tone mani.


Overall, we're really impressed with this collection from Essie and definitely recommend picking up a few shades. Let us know what you think!

Disclaimer: Some or all of the products mentioned in this post may have been provided by the company/PR for our honest consideration and review.
Tiffany and Co. Inspired Nail Art Video Tutorial

We are so excited to present our latest foray in to the YouTube world of nail tutorials... A tutorial for our favourite and probably most shared nail design!


We used the following polishes: China Glaze For Audrey, Covergirl Non-Stop Stone, OPI Push and Shove, OPI Snowflakes in the Air, and China Glaze White on White. We also used a hex nail jewelry Heart No. 1 charm available here, as well as some bornprettystore.com brushes available here. You can also use the code KNAILART for a 10% discount at www.bornprettystore.com!

NARS x Pierre Hardy 'Sharplines' Nail Art

When NARS announced their collaboration with shoe designer Pierre Hardy, we could not have been more excited. Pierre Hardy has a terrific sense of colour matching, and he did not disappoint in this collection. We received the Sharplines set to review, and we are obsessed with these twosomes. This is a photo of the full collection, courtesy of NARS. All of the colour pairings are right on, and the lemon and lavender pastels of the Sharks collection (the second pair from the right) might be our favourites.
The set we received, Sharplines, contains a true Peach colour, as well as a maroon which is quite thin and layers to a deep red (almost black!). One coat of the burgundy polish appears almost jelly in consistency, but with added coats opacity comes quickly. The best thing about this duo? The price is $32 for two polishes, where one NARS polish will set you back $19. There is one extra pairing (not pictured above) exclusive to the NARS website called Venomous, which includes a black and gunmetal (although it appears more similar to a rich silver). The polishes also come with a dust bag (every polish should come with one… for the truly obsessed!) and a box, similar to shoe packaging seen in Pierre Hardy's own line.

For our nail art, we searched the Pierre Hardy website for inspiration, and came up with this mani. It is inspired by the top view of a foot in a heel - we interpreted it loosely, as you can see! The polishes went on extremely well - for a brand not known for its polishes, we were definitely impressed. The peach colour was opaque in two thin coats, and the burgundy we are hoarding for fall - it is the perfect oxblood colour.


Overall, we're loving how these came out and are super impressed with the colour and quality of these NARS polishes. Definitely worth it to check these out if you see them in a Sephora (or are lusting over Venomous online).

Disclaimer: Some of  these products were provided to us by the company/PR for our honest consideration and review.


NOTD: Nails Inc. Feathers in Brighton over Essie Mint Candy Apple

Today we picked up the only colour from the Nails. Inc. Feathers collection that we 'needed' from Sephora, and we really had to try it with our one true minty love, Essie Mint Candy Apple. We chose Brighton Feathers, which is a combo of yellow and blue rubber-y bar glitters (although they don't shimmer) in a clear base.


Overall, we love how this looks, although there were some micro bubbles in the Mint Candy Apple (viewable in the Macro shot…) which we feel may have been caused by the Feathers (though it can also be caused by dirt and moisture on the nail surface. 

This does give your nails an overall fuzzy look - but we think it would look great for a monster themed nail art! Our first thought when we look at these nails is Monster's Inc. 

What do you think of these nails, would you try them?

NOTD: Fruity Tip Nails


As Summer approaches (soon, please!) we thought it would be fun to get in the citrus-y spirit with some fruity tips on naked nails! We love how these turned out and the fruits we were aiming for were the classics: lemon, lime, and orange, and then blood orange and grapefruit. How did we do?

This nail art was super easy to do! We used the actual polish brushes to create the circular tip on the edge of the nail, then used a nail art brush to create the triangle wedges within each fruit, and a super thin striping brush to create the white 'sheen' on the fruits. We love how these turned out and are definitely going to re-wear these when summer rolls around!


Glow in the Dark Mani ft. PolishMeToGo


This week Target Canada had a soft opening and finally Sinful Colours polish (1.99 a bottle!) was available! We were in need of another black, so I picked this one up! Some gorgeous PolishMeToGo polishes had also arrived in the mail - and I was so excited to finally be able to make some glow in the dark magic! PolishMeToGo is an indie brand which makes the most vibrant glow in the dark polishes out there! You can check out their line on their bigcartel store! This mani was inspired by @preciouspolishxo on Instagram, who runs the precious polish blog!

We started with PolishMeToGo's White Undie, which went on totally opaque in one coat! Then we used a cosmetic sponge to dab the ombre of PolishMeToGo Yell, Oh Mint and I'm So Blue on the full nail. We did this approximately three times per nail to opacity. Then, using a nail art brush and the black Sinful Colours polish, we outlined the nail (excluding the free edge) and then followed that shape about a third of the way down the nail. We then used PolishMeToGo White Undie again to brighten the crescent at the top of the nail. Then, using a clean nail art brush, we painted the colour of the free edge of the nail over the crescent. Add top coat, and you're good to go! To keep this mani fun, we inverted our colours on our two middle nails.


The best part of this mani… is that is glows! This photo was taken in the dark after approximately 20 seconds under a LED desk light. This is the brightest glowing polish we have seen, and we just cannot get enough! Be sure to check out PolishMeToGo on Facebook, and Instagram!


Disclaimer: These products were provided to us by the company/PR for our honest consideration and review.

Tulip Nail Art ft. PRITI NYC


So here we are, only a month left until Spring officially starts - and already I'm excited for winter to be over… if only all the Canadian snow would melt. Today we have a manicure for you which features a brand which is new to us, Priti NYC. This brand is non-toxic and 4 free, or free of 4 known carcinogens including  toluene, dibutyl phthalate (DBP), formaldehyde, and camphor. Many brands are marketing themselves as 3 free recently - for more on what this means see All Laquered Up's great resource on this topic!

Priti NYC was started in 2005 by founder Kim D'Amato with the goal of reducing harmful chemicals and supporting organic farmers - and we have to say that it is a success! For all the eco-friendly non-believers out there, these polishes will change your mind, no question about it. Crown of Thorns (a gorgeous baby blue) delivers in terms of colour payout and opacity. We cannot get enough of this colour and have been rocking it solo with an accent nail. For all the pastel lovers rejoicing at Spring's new collections - this colour is for you!

To help usher in the Springtime, we used a few (but really, 8) of Priti NYC's shades to create a full finger tulip mani, putting accent nail florals to shame! This mani was created using Crown of Thorns as a base. We started by using the darker pink and yellow (Nice Gal Peony and Lampshade Poppy, respectively) to draw a U shape with a thin brush wherever we wanted the flowers to be. We tried to make each nail different - that's part of the fun! Then we used the lighter pink and yellow (Ballerina Peony and Horned Poppy) to fill the U half full with the same nail art brush. While waiting for the tulips to dry before adding white, we used a clean nail art brush to draw stems in Baby Tears from the base of each tulip to the free edge of our nail. We added some leaves for fun, and then used the lighter green shade, Love Patt, on top, to give a more dimensional look to the leaves. To finish this mani, we used White Ballet Dahlia on the tips of both the tulips (using a clean nail art brush). Then we used our favourite Seche Vite topcoat, and allowed to dry. Check out the picture below, and let us know what you think!


Overall, the Priti NYC polishes were easy to apply and had a better smell than most other nail polishes - which we love! We definitely recommend checking out Priti NYC, you can find them on Facebook, Twitter, and Pinterest!

Disclaimer: These products were provided to us by the company/PR for our honest consideration and review.

Geo Nails


We've been dying to try these nails since we first saw them all over instagram, but we couldn't find a colour match we were in love with enough to really go for it - until we decided on these. Essie's Bikini So Teeny, available here, and Nails Inc. Sumner Place, available here.

We started with Essie Bikini So Teeny on all nails (except the ring finger and thumb, which we inverted to Sumner Place), then used striping tape to make a perfect line up the middle of any fingers we wanted this design on. We then used a nail art brush to brush on an angled line starting from the middle of the nail in the centre, to about 3/4 to the cuticle on the edge. We then 'filled in' the bottom half with the opposite colour, and allowed the polish to dry before peeling off the striping tape. Finish with some topcoat, and you're done!


This mani was quick and easy, definitely a good first attempt at working with striping tape. More striping tape mani's on their way in the future...

Spring Striped Mani


Spring has sprung! Or is that just our nails? Regardless, we're getting in to the season by sporting some bright and pastel stripes on our fingertips. For this look we used a variety of brands and colours, but the fun of this mani is mixing and matching! Gather a bunch of your favourite polishes and go with the flow. We used striping tape, available here, to create the straight edges for our lines - but you could just as easily use a thin paint brush available at your local craft store.


We started with OPI's Alpine Snow for our base, a classic white with great coverage. We used Seche Vite top coat and let that dry for about 10 minutes, to ensure the striping tape didn't strip the white polish. Then we applied striping tape at different intervals to achieve the bands of different thickness. We used a few of our favourite colours, examples above, to paint within the boundaries of the striping tape. Alternating the order of your colours on each nail makes this mani even more playful, we tried to keep each nail different! Then, after a few minutes drying time, we carefully peeled off the striping tape and finished with a second coat of top coat! Voila, stripes for spring!

Red Rose Nails ft. Butter London


If you didn't know, Valentine's day is coming up. Shocked? Us too. We've been the culprit of the done to death heart nail art many times, but this time we decided to go for a fresh take on Valentine's day nails - red roses! Thanks to Butter London's 25% off Reds Sale, we picked up some classic reds including Blowing Raspberries, Knees Up, Pillar Box Red, and the classic Union Jack Black.

Close up of the middle and ring finger
We have been feeling like a full hand nail art was in store - go big or go home, right? - and so we painted each nail to look like a bouquet of red roses. We started (post base-coat) with Knees Up, which is a gorgeous metallic red which catches the light behind the roses. We then used a nail art brush to make swirl patterns (making up a circle) of Blowing Raspberries and Pillar Box Red covering most of the nail in circles, or 'roses-in-progress', to create depth. We then used a steady hand and a super-thin nail art brush to paint the shadows of the roses in Union Jack Black. Finish with topcoat, and voila - a wilt-proof red rose bouquet!

Full Red Rose Nails
If you're feeling like the full hand is too much for you, we also love this look on the accent nail, with a full hand of Blowing Raspberries (which may just be our new go-to berry shade) to contrast the metallic. What mani will you be rocking on Valentine's day?

NOTD: Ombre Love Manicure


Valentine's Day Nail Art

 With Valentine's Day right around the corner, we think it's the right time to get in the spirit and embrace the heart-filled nail art craze. To keep this mani fun and fresh, we used an OPI Liquid Sand Shade on the thumb and ring finger, and used a bold red with black and white accents on the remaining fingers. We love the results, and the added texture from OPI Liquid Sand makes this mani even more interesting to look at! If you can't get your hands on OPIs Liquid Sand collection, we recommend a glitter accent nail in a coordinating shade.

What you need:

  • Red nail polish (we used Nails Inc. St. James, available here)
  • White nail polish (we used China Glaze White on White, available here)
  • Red Liquid Sand nail polish/Glitter nail polish (we used OPI Liquid Sand The Impossible, available here)
  • Black nail polish (we used Essie Licorice, available here)
  • Nail art brush (available, as a set including a dotter, here)
  • Base coat and top coat (we used Essie First Base, available here, and Seche Vite top coat, available here)
What to do:
  1. Paint all nails with a base coat.
  2. Paint your accent nails (thumb and ring finger) with the red liquid sand (or glitter) polish, and all other fingers with a red polish. Do 2-3 coats as required.
  3. Pinky: Use black polish on half of the nail, and paint the top half of 'LOVE' using a nail art brush. After that dries, use the (clean) nail art brush and white polish to connect the bottom half of 'LOVE'.
  4. Middle Finger: Using the nail art brush and black polish, starting at the centre of the nail, make two dots and then drag the dots together, making a small heart. Repeat this until the nail is covered. Then, using a clean nail art brush, put white polish inside one of the hearts as an accent heart.
  5. Pointer Finger: Using white nail polish and a nail art brush, draw many xo's all over the nail, and then draw a larger white heart in the centre of the nail (following the procedure in step 4). Then, using a clean nail art brush, fill in the white heart with black  polish.
  6. Allow all to dry, and paint with a top coat! Note: for OPI Liquid Sand, do not topcoat, as the matte 'sand' effect will be lost.


Completed Valentine's Day Nails