Showing posts with label nail art. Show all posts

Festival Style: Crystal Geode Nail Art

Matte Crystal Geode Nails by knailart
These matte crystal geode nails are the perfect festival season accessory! We started with a silver sparkly base around the edges, and a clear sparkly base on the rest of the nail—perfection isn't required! After that, we used a thin coat of OPI's Sheer Tints to start off each nail followed by various similar shades from lightest at the inside of each 'crystal' to darkest at the edge of the silver shade. We dripped some acetone over the nails (and blew dry!) before finishing with top coat to get the finished smoky look.

Crystal Geode Nails by knailart


 We love how these look matte, but they are much more realistic when left shiny. Let us know if you try something like this out, and happy polishing!

Fresh Fun Rainbow Nail Art for Spring!

Rainbow Nails for Spring!
 Spring is here and we've taken some inspiration from the copious of mini eggs we've consumed (as pictured above). We used 8 different colours with a pastel and bright shade of each to create this fun look!

A close up of our Rainbow Nails for Spring!

NOTD: Matte Pastel Florals for Spring

Matte Spring Floral Nails with Deborah Lippmann 'Glitter in the Air' as the base
As Spring (slowly!) begins, today's NOTD are these spring florals using Deborah Lippmann 'Glitter in the Air' as the base - a fabulously minty glitter that is the perfect backdrop for these beauties!

Happy polishing!

DIY: Plan your nail art with the knailart nail art template!

Check it out! We created this template to plan our nail art and keep track of the polishes we're using. 

Print this out and write down the polish names, add a quick swatch, and sketch or draw on your designs! We've included it here as a photo file that you can save and print, or you can download the larger pdf version here!


Share your creations with us on Instagram with the #knailart!

TUTORIAL: Green Flash Gradient Summer Nails!

Hey everyone!

We tried to match our ultimate summer favourites - our Ray Ban Green Flash aviators! We used a sponged gradient of O.P.I. Angel with a Leadfoot, Essie Vices Versa, Sally Hansen Dive In, and Essie I'm Addicted over two coats of O.P.I. Push & Shove to create this super fun look. Check out the video tutorial to see how we did it!


This looks super amazing in the sun... If you try it out, let us know by tagging us @knailart or using the #knailart everywhere social!

Our Bio Sculpture Gel Experience + Feather Nail Art!

We have always considered gel nails, as when we have a nail break it impacts the size of our tiny canvases! We decided to take the plunge and try out Bio Sculpture Gel nails with Bio Sculpture Gel Canada - and we were super excited with the result!

Bio Sculpture Gel is the only gel to have a clinical trial and a five-star safety rating, and soak off without acetone! We wore these for two weeks before our impatience kicked it, but we think we could have stretched it one or two more weeks (if we didn't have polish ADD).

Bio Sculpture Gel has three different options for flexibility, and we went with Flexi gel - the medium option! The free edge gel was added to extend the natural nail, and after buffing we were left with gorgeous, completely natural looking nails! We were totally impressed... and if you want to see the 'before' shot, click here.

We then decided to go with a bright blue coloured gel shade from their Carnival trend collection - it's number 175, Havana Nights. After that, we topped the look off with some fun feathered nail art!

Check out the progression of our mani below, and let us know if you've tried out Bio Sculpture Gel!


Disclaimer: Some of the products or services mentioned in this post may have been provided by the company/PR in exchange for our honest review.

NOTD: Hawaiian Nails!

Hawaiian Half Moon Mani
We're obsessed with these destination nails... We used O.P.I. You're So Vain-illa as the base for the half moons, then dry brushed YSL Safran Sultan, Beige Gallery, and Brun Panasse over top! We then cleaned up the half moons with an angled brush with acetone, and used a dotter to create the multicoloured flowers on the edge! We used a tiny brush and some black and white polish to create the finished flowers for a more realistic look!

Let us know what you think of these nails in the comments - would you wear them? Happy polishing!

NOTD: Diet Coke Nail Art ft. Coca Cola for O.P.I. Collection


We are huge Diet Coke fans - so when we realized the O.P.I. Coca Cola collaboration had a chrome-y sparkly silver inspired by Diet Coke we were super excited. The background polish is 'Today I Accomplished Zero' and the Diet Coke nail uses My Signature is 'DC' (the silver chrome), Coca Cola Red and our blackest black - YSL Noir Primitif. We also added some bubbles using the vanilla coke shade - You're So Vain-illa. Overall - we love this collection! The silver is to die for... Stay tuned for swatches of the full collection!

TUTORIAL: Holographic Glitter Polka Dot Nails

YSL La Laque Couture in Noir Primitif with Holographic Glitter Polka Dots
We love how quick and easy this look is! Check out our YouTube tutorial to get the details! The glitter is from www.BornPrettyStore.com and is available here in option #1! Feel free to use code 'KNAILART' for 10% off!


Happy polishing!

Mother's Day Floral Nail Art

Mother's Day Floral Nail Design and LUSH Cosmetics 'Mum' Bubble Bar


We created this floral mani inspired by a Papyrus Mother's Day Card! Pictured with the LUSH Cosmetics 'Mum' Bubble Bar - a great Mother's day gift option for any mom. Gearing up for Mother's Day, we also put together a quick insta-video tutorial.


 Let us know what you think, and if you try out this mani let us know!

TUTORIAL: Faded Spring Floral Yin-Yang Nail Art

Matte Faded Floral Yin-Yang Nail Art


Get the look - polishes used include:

China Glaze White on White
(Dark to Light)
Pinks - Essie Bottle Service, Essie Boom Boom Room, Revlon Pink Pineapple
Blues - Essie In The Cab-ana, China Glaze For Audrey, Essie Mint Candy Apple
Purples - O.P.I. Push and Pur-pull, Essie Play Date, Essie Under Where
Greens - China Glaze Starboard, Essie The More the Merrier, Essie Navigate Her
Ciaté Speed Coat Pro
Essie Waltz
Nicole by O.P.I. Matte Top Coat

What do you think of this look? Let us know in the comments if you try it out!

NOTD: Spring Pastel Rainbow Tie-Dye!

Pastel Tie Dye Nails by knailart (Pictured: China Glaze At Vase Value)

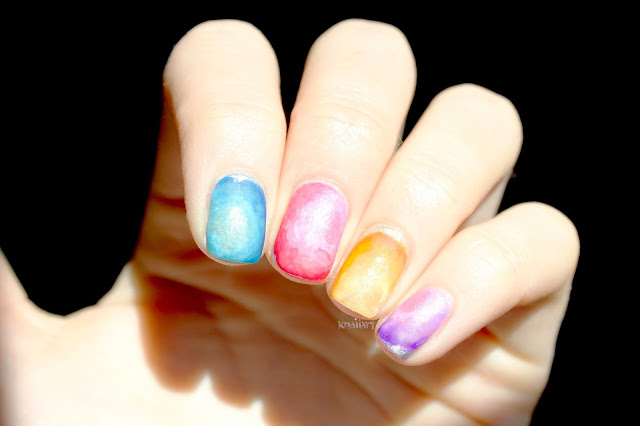
We're back at it! A spring-time pastel tie dye is our obsession of the moment - and they may be pastel, but in the sun they look super vibrant! We used mostly China Glaze pastels from the City Flourish collection, including the pictured At Vase Value. If you would like to know more about how to achieve the tye-die look... check out our neon rainbow tie dye post here! Happy Spring!

Pastel Tie Dye Nails by knailart

Ciaté Luxe Metal Caviar Manicure in Lustre

Ciaté Luxe Caviar Manicure set includes pearls in Lustre, and a Ciaté paint pot in Ladylike Luxe.
 We were excited to try out the Ciaté Luxe Pearls set after realizing that the microbeads were actually made of metal (they even feel heavier than normal microbeads in the bottle!), since we love the look, but hate when topcoat bleeds the colour. The set includes a polish, pearls and a funnel (to save the extras!) and based on how much we used for one full set of nails, you should have enough beads to do at least 6 or 7 full out nails. If you are using the beads for accents though, you will have more than enough for many manis!

We tried out this look on our full nails, and it wore for three days, although it was just over 48 hours before we had any bead loss. We have read reviews of this leaving a coloured dot on nails where beads were placed, but we used a base coat and had no ill effects! We also used the Ciaté Speed Coat Pro which we are happy to report had amazing dry time, and looked great over the microbeads.

Ciaté Luxe Metals in Lustre

What do you think of this look? The metallic sets are available in Silver, Gold and Rose Gold and are on sale on Sephora now for $23! We're especially lusting after the Gleam set which is a rosy gold metal!

Stay tuned to see the accent nail we did using the microbeads from this kit in the next few days!

Disclaimer: Some of the products mentioned in this post may have been provided to us by the company/PR in exchange for our honest opinion and/or review.

NOTD: Bro, do you even nutella?


Is an explanation for this manicure necessary? Nutell-us. (We're out of control. Send help.)


Tiffany and Co. Inspired Nail Art Video Tutorial

We are so excited to present our latest foray in to the YouTube world of nail tutorials... A tutorial for our favourite and probably most shared nail design!


We used the following polishes: China Glaze For Audrey, Covergirl Non-Stop Stone, OPI Push and Shove, OPI Snowflakes in the Air, and China Glaze White on White. We also used a hex nail jewelry Heart No. 1 charm available here, as well as some bornprettystore.com brushes available here. You can also use the code KNAILART for a 10% discount at www.bornprettystore.com!

Nail Art: Revlon Sun Candy in Shimmering Sunset

Revlon Sun Candy in Shimmering Sunset
Revlon is releasing a new line of double ended nail art products called 'Sun Candy' - this is a bright pink polish and a matching jelly with flaky glitters. Obviously, as lovers of all things pink and glitter, this was right up our alley. 
We frequently get asked how to do a glitter gradient - and the answer is that a glitter gradient takes patience and a building up of thin coats. This is the perfect glitter to practice with! You cannot go wrong and as long you use thin layers, this will end up looking great!

Glitter Gradient using Revlon Sun Candy in Shimmering Sunset
For this look, we used two coats of the pink creme polish and three super thin layers of the glitter polish, starting with half of your nail from the middle to the tip, and getting closer to just the tip with each glitter layer.

Hopefully this is a helpful way for anyone scared of going for a glitter gradient to step outside of their comfort zone!

Disclaimer: Some products may have been sent to us by the company/PR in exchange for our honest opinion and review.
Valentine's Day Conversation Hearts!

We're continuing to get in to the Valentine's Day Spirit - and what better way than nail art featuring some of our favourite Valentine's Day candy? Let's be honest... candy may be the best part of Valentine's Day. We decided on a Conversation Heart-themed mani featuring some of our favourite Lime Crime pastels, a Nicole by O.P.I. nude (That's Putting it Mild), and the Nicole by O.P.I. matte top coat.

To achieve this look, we hand-painted all the art, and then topped it all with a coat of the Nicole by O.P.I. Quick Dry top coat (quite useful since we are extremely impatient...). Finally, we used a nail art brush to selectively apply matte top coat only to the hearts, giving them a more chalky, true to life appearance.

What do you think of this look?

Dislcaimer: Some of the products used may have been provided by the company/PR in exchange for our honest opinion and review.

Nail Art: Glitter Placement ft. Nicole by O.P.I. Be Awesome

When we saw that Nicole by O.P.I. was releasing some new permanent shades for 2014, like all completely normal nail polish-addicted people we hoped for an amazing glitter polish. Thankfully, the glitter gods (or goddesses?) smiled upon us, and Be Awesome was bestowed upon us - or at least something as magical as that happened.

We proceeded to do an accent nail with this technique and some of the other new colours - then we took that off and got a little bit crazy and decided to do every nail. In all its glory, our full mani using this glitter is below. Note that if you decide to do this, you may use a quarter of the bottle of polish as we shamelessly did - but it was worth it.

Glitter Placement Nails using Nicole by O.P.I. Be Awesome
What do you think of this mani? 


Disclaimer: Some of these products may have been provided by the company/PR in exchange for our honest opinion and review.

Nail Art: New Nicole by O.P.I. Permanent Collection Additions!

Nicole by O.P.I. has released some new additions to the permanent collection, and we could not be loving their choices more! We decided to try a nude to teal gradient using Teal Me Something New (the teal!) and That's Putting It Mild (the nude!). We have to say, we absolutely love this nude colour. It is the perfect beige and we love how it looks on our nails. The teal colour is going to be absolutely perfect for spring and summer, we cannot wait to start using it in some brighter manis! 

The real showstopper here is the glitter though, called Be Awesome - and that it is! We have been searching for a glitter polish like this for ages, and even considering going for the loose glitter option, but this polish has come to the rescue! It makes the chevron patterned accent nail super easy and totally sparkly! Check out the nail art we did with these polishes below, and stay tuned for some more nail art using Be Awesome!


Disclaimer: Some products have been sent to us by the company/PR in exchange for our honest review and opinions.

OPI x Gwen Stefani Nail Art Kit ft. Over & Over A-Gwen and Swarovski!


The Gwen Stefani for OPI signature shade was released in a kit including some Swarovski elements and as hard as we tried to resist making a joke about it being bananas - this kit is bananas. The shade is the perfect Gwen red (as to be expected) and the nail art supplies have a rock and roll twist that would mesh with any of the polishes in the collection.

The box is beautiful on its own, we can't ever get enough red.


The kit comes in a large box which includes the shade Over & Over A-Gwen, along with a tiny nail art glue, and 5 different Swarovski elements. Also included is a little nail art guide which contains suggestions for art using the whole collection of Gwen for OPI polishes. The contents of the box are pictured below!
The Nail Art Glue, Swarovski elements, and Nail Art Idea book!
Over & Over A-Gwen
 Finally, after much anticipation and a little drooling, we got to work. The Over & Over A-Gwen polish is a gorgeous orange-y red that leans to a jelly finish. It is ultra-shiny (the look is topcoat-free with two coats) however there is a tiny bit of visible nail underneath. We used the tiny gold buttons and larger diamond studs and we love how it turned out.

Our finished nail look ft. OPI Over & Over A-Gwen and Swarovski elements.


Disclaimer: These products were provided by the company/PR in exchange for our honest opinions and review.