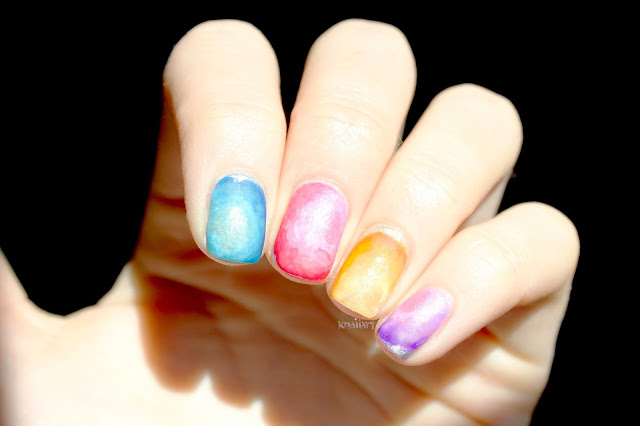
Nail Art: Revlon Sun Candy in Shimmering Sunset

Revlon Sun Candy in Shimmering Sunset
Revlon is releasing a new line of double ended nail art products called 'Sun Candy' - this is a bright pink polish and a matching jelly with flaky glitters. Obviously, as lovers of all things pink and glitter, this was right up our alley. 
We frequently get asked how to do a glitter gradient - and the answer is that a glitter gradient takes patience and a building up of thin coats. This is the perfect glitter to practice with! You cannot go wrong and as long you use thin layers, this will end up looking great!

Glitter Gradient using Revlon Sun Candy in Shimmering Sunset
For this look, we used two coats of the pink creme polish and three super thin layers of the glitter polish, starting with half of your nail from the middle to the tip, and getting closer to just the tip with each glitter layer.

Hopefully this is a helpful way for anyone scared of going for a glitter gradient to step outside of their comfort zone!

Disclaimer: Some products may have been sent to us by the company/PR in exchange for our honest opinion and review.

Valentine's Day Conversation Hearts!

We're continuing to get in to the Valentine's Day Spirit - and what better way than nail art featuring some of our favourite Valentine's Day candy? Let's be honest... candy may be the best part of Valentine's Day. We decided on a Conversation Heart-themed mani featuring some of our favourite Lime Crime pastels, a Nicole by O.P.I. nude (That's Putting it Mild), and the Nicole by O.P.I. matte top coat.

To achieve this look, we hand-painted all the art, and then topped it all with a coat of the Nicole by O.P.I. Quick Dry top coat (quite useful since we are extremely impatient...). Finally, we used a nail art brush to selectively apply matte top coat only to the hearts, giving them a more chalky, true to life appearance.

What do you think of this look?

Dislcaimer: Some of the products used may have been provided by the company/PR in exchange for our honest opinion and review.

Nail Art: O.P.I. Brazil Gradient Manicure

O.P.I. I Just Can't Cope-Acabana, Where Did Suzi's Man-Go? and Toucan Do It If You Try

When we saw the bottle shots of the O.P.I. Brazil collection for Spring/Summer 2014 we had a moment of tropical excitement - despite braving temperatures in the negatives in chilly Canada. We consistently look for polishes lacking in our collection, and orange and yellows always top that list. After using the yellow polish, I Just Can't Cope-Acabana, we can totally confirm that it is the perfect creme yellow for our nail art needs. If you are starting to get in to nail art or looking to do a rainbow design and lacking a yellow - you need this. If you are looking for bright, punchy orange and orange-y pinks, the other two polishes are for you! 

We used a sponge with some topcoat on it (to prevent absorption of the gradient polishes) and sponged 4 coats on with no base coat. The coverage is pretty amazing for four sponged coats, we are definitely impressed. If these polishes are any indication of what the whole Brazil collection will be like, we will definitely check out a few more! We cleaned up the mani using acetone and a nail art brush, and topped it off with an O.P.I. top coat. 


What do you think of this mani? Would you wear this bright gradient in the hot weather?

Disclaimer: Some of these products may have been provided by the company/PR in exchange for our honest opinion and review.

EASY Glitter Gradient Video Tutorial


Hey guys! Check out our glitter gradient tutorial using O.P.I. Toucan Do it if You Try, Snowflakes in the Air and Essie Hors D'Oeuvres - let us know what you think of the look in the comments below!

Nail Art: Glitter Placement ft. Nicole by O.P.I. Be Awesome

When we saw that Nicole by O.P.I. was releasing some new permanent shades for 2014, like all completely normal nail polish-addicted people we hoped for an amazing glitter polish. Thankfully, the glitter gods (or goddesses?) smiled upon us, and Be Awesome was bestowed upon us - or at least something as magical as that happened.

We proceeded to do an accent nail with this technique and some of the other new colours - then we took that off and got a little bit crazy and decided to do every nail. In all its glory, our full mani using this glitter is below. Note that if you decide to do this, you may use a quarter of the bottle of polish as we shamelessly did - but it was worth it.

Glitter Placement Nails using Nicole by O.P.I. Be Awesome
What do you think of this mani? 


Disclaimer: Some of these products may have been provided by the company/PR in exchange for our honest opinion and review.

Nail Art: New Nicole by O.P.I. Permanent Collection Additions!

Nicole by O.P.I. has released some new additions to the permanent collection, and we could not be loving their choices more! We decided to try a nude to teal gradient using Teal Me Something New (the teal!) and That's Putting It Mild (the nude!). We have to say, we absolutely love this nude colour. It is the perfect beige and we love how it looks on our nails. The teal colour is going to be absolutely perfect for spring and summer, we cannot wait to start using it in some brighter manis! 

The real showstopper here is the glitter though, called Be Awesome - and that it is! We have been searching for a glitter polish like this for ages, and even considering going for the loose glitter option, but this polish has come to the rescue! It makes the chevron patterned accent nail super easy and totally sparkly! Check out the nail art we did with these polishes below, and stay tuned for some more nail art using Be Awesome!


Disclaimer: Some products have been sent to us by the company/PR in exchange for our honest review and opinions.

OPI x Gwen Stefani Nail Art Kit ft. Over & Over A-Gwen and Swarovski!


The Gwen Stefani for OPI signature shade was released in a kit including some Swarovski elements and as hard as we tried to resist making a joke about it being bananas - this kit is bananas. The shade is the perfect Gwen red (as to be expected) and the nail art supplies have a rock and roll twist that would mesh with any of the polishes in the collection.

The box is beautiful on its own, we can't ever get enough red.


The kit comes in a large box which includes the shade Over & Over A-Gwen, along with a tiny nail art glue, and 5 different Swarovski elements. Also included is a little nail art guide which contains suggestions for art using the whole collection of Gwen for OPI polishes. The contents of the box are pictured below!
The Nail Art Glue, Swarovski elements, and Nail Art Idea book!
Over & Over A-Gwen
 Finally, after much anticipation and a little drooling, we got to work. The Over & Over A-Gwen polish is a gorgeous orange-y red that leans to a jelly finish. It is ultra-shiny (the look is topcoat-free with two coats) however there is a tiny bit of visible nail underneath. We used the tiny gold buttons and larger diamond studs and we love how it turned out.

Our finished nail look ft. OPI Over & Over A-Gwen and Swarovski elements.


Disclaimer: These products were provided by the company/PR in exchange for our honest opinions and review.

LOVE Nail Art ft. Nicole by O.P.I. Matte Top Coat

Nicole by O.P.I. recently released some new treatments, including a matte top coat. As a fan of anything matte - we had to give it a try. We also love the Nicole by O.P.I. brushes and it was perfect for some Valentine's day nail art we had in the works.

Nicole by O.P.I. Something About Spring topped with Matte Top Coat
Here is Something About Spring (a new member of the NOPI permanent line, and a great pink creme!) and the NOPI Matte Top Coat. Overall, we thought it applied great and if you prefer the brushes in the Nicole by O.P.I.

Love Nail Art using Nicole by O.P.I. Matte Top Coat to drag and mattify the nails.

With less than a month to go, we are getting in to the Valentines Day spirit with some love-themed nail art. This look was painted on using China Glaze White on White and then quickly (we went nail by nail so the polish didn't have any time to dry!) dragged down with Nicole by O.P.I Matte Top Coat to great the final look.

Disclaimer: These products were provided by the company/PR in exchange for our honest opinions and review.

Boomf - Instagram on Marshmallows

Our Marshmallow Instagrams from Boomf


So we were super excited to be able to use all of the technology innovations and exciting advances in order to eat marshmallows printed with our instagram photos on them. Sound crazy? Boomf, a UK company, provides 9 instagram marshmallows for your viewing and eating pleasure for £12 or about $20 (free shipping in Europe and North America!). We picked our favorite 'grams and the magicians at Boomf sent them back in marshmallow form. As lovers of all things food related, we could not resist eating them and are happy to report that they are pretty good! Check out some photos of our experience below and let us know what you think of this crazy concept!


A marshmallow waiting to be devoured in a hot chocolate. Or, the only
appropriate way to enjoy a marshmallow of your nails.


A close up of the quality, decent for marshmallows in our opinion!

If you're interested in some marshmallowy goodness of your own, Boomfs are available at boomf.com!


Disclaimer: These products were provided by the company/PR in exchange for our honest opinions and review.

Push & Shove: OPI Goes Chrome!


We have to admit that we were overly excited when we heard that the O.P.I. Gwen Stefani collection was going to include a chrome shade - Push & Shove. Comparable options such as the Layla Mirror Effect polish ($12 CAD at Nail Polish Canada) and the Formula X for Sephora Foil Look ($30 CAD at Sephora) run a bit unavailable and expensive for our tastes. Not to mention, the O.P.I. set comes with a mini base coat (Lay Down That Base) which should smooth out the nails. Any ridges or bumps can make the chrome polish effect less chrome-y - and will be very visible. 


It is worthwhile noting that this polish is intended to one day wear, which is similar to the other options. Since the chrome finish is more effective without top coat, this is prone to peeling but after testing on two of us, it does seem to last for a solid 24 hours with no terrible issues. The iPhone photo below was taken about 25-26 hours after application, and as you can see there is some tip wear but if you wanted to leave it on 48+ hours and you weren't working with your hands it would likely be okay!


What do you think of this product, would you wear a polish that only promises to last 24 hours? We love this look and can't get over it. 

The Push & Shove set (including mini base coat) retails for the same price as a regular O.P.I. polishes! 


Swatched: Rainbow Honey now available at NailPolishCanada.com!

In celebration of the launch of Rainbow Honey, a line of custom blended nail lacquer, at NailPolishCanada.com we have some Rainbow Honey swatches for your viewing pleasure. We have swatched some Rainbow Honey polishes before and while they do have great formulations on all there polishes, we go crazy for any of their glitters. We absolutely love how gorgeous their glitter polishes look and they always get colours and blends spot on... That said, bring on the swatches!


First up is Apple Kid, a super bright shimmery pink or fuchsia from The Summer of 199X Collection. This swatch is two coats with no top coat, and we love how opaque this polish is and how smooth the formulation is. This is definitely one of the brightest colours we have seen and you can't go wrong with a pink. That being said, there are plenty of other polishes that can give you a similar look if you aren't too specific with colour.


Next up from The Summer of 199X Collection is Fire Spring - this is our absolute favourite! We love a good orange, they are totally lacking in most polish lines and the shimmer in this is literally unbelievable. This is a perfect polish to match a summery tan and it reflects light like no other. This swatch is two coats, and its essentially opaque (you can almost see the nail line on the ring finger). This is a fantastic lacquer and we cannot say it enough.


This deep purpley-blue with blue shimmer is from The Final Battle Collection, called Ultimate Weapon. This applied a bit patchy as you can see on the index finger, and is nothing to write home about. If you are in love with the colour we would say go for it, but otherwise leave it on the (online) shelf.


This glitter topped, called I Miss You from The Summer of 199X Collection, is perfection. Butterfly glitter... We love it. This is one coat on top of Ultimate Weapon, and literally there are butterflies on every finger. We imagine it may take two layers of top coat to ensure that no wings are sticking out, so if that puts you off then this polish may not be for you. As mentioned, Rainbow Honey does amazing glitters and this polish is proof.


Finally we have Tidal Wave, from The Final Battle collection. This polish isn't opaque in two coats, but it is absolutely beautiful when the holographic glitter catches the light. This would be great as a topcoat over a brighter turquoise shade and for a glitter gradient. We definitely love this polish and as always, recommend any Rainbow Honey glitter.


Will you be checking out NailPolishCanada.com for any Rainbow Honey glitters? We also recommend them for any Canadians looking for Zoya - particularly the Pixie Dusts! 

Disclaimer: These products were provided by the company/PR in exchange for our honest opinions and review.

Swatched: Essie Encrusted Treasures Collection

Today we have some swatches of the Essie Encrusted Treasures collection. This collection claimed to be a game changer in textured polishes, and while I feel that some of the polishes can't be beat, there are definitely a couple that definitely missed the mark. As Essie-lovers, we are sad to say that this collection didn't live up to our expectations as a whole - however, we have still been using the better formulated polishes on the regular and loving them.

We are missing one swatch from today's line up - Peak of Chic - which is a holographic silver and white bar glitter (in a clear base). This polish applied well, and is similar in finish to the feathers collection by Nails Inc. On to the swatches...

Our first disappointment is the headline shade for the collection, and one of the polishes we were most excited about - Belugaria. This polish is marketed as highly textured - and that it is! However, the thick sandy texture causes highly clumped polish in the bottle which just doesn't translate on the nail. The one saving grace, the holographic glitter, is sadly not quite visible through the thick polish. This is two coats with no topcoat, and as you can see it is quite bumpy. While we are all for the textured polishes, this one just missed the mark. The finish is definitely caviar, and we have used on our nails, however we wish that there was a little less texture, and a little more glitter.
Next up we have a potential favourite, Hors D'Oeuvres is a silver glitter in a gold shimmered clear base. This has super incredible coverage and is literally an obsession of ours. This polish would be perfect for a glitter gradient or accent  nail, and we definitely recommend picking it up.
This charcoal-silver matte glitter is another hit from this collection. Ignite the Night is gorgeous on and would also be a great accent nail. This polish applies well and has great sparkle.  We love this for spring mixed with pastels. Stay tuned for some nail art featuring this shade! This polish is not quite textured, but does dry matte and maintain its shimmery goodness, which is a super cool finish.

Another one of the better polishes from this collection is the sparkly blue jean textured polish named Lots of Lux. This polish is not aggressively textured like Belugaria, but has a slight texture and a gorgeous sparkly finish. We love how this looks on the nails and it will definitely get some wear on all of our nails!
Finally we have the most unusual polish of the bunch. Essie is generally not a risk taker with glitters such as this, but the mix of blue glitter with a silvery gold shimmer base is a fun twist on the norm. This polish applies well, and we may try it out in a glitter gradient over a lighter blue to see how it fares. If this type of polish is your thing, we say go for it - but if you're a little less daring, stick with Hors D'Oeuvres for your silver and gold glitter needs.


What do you think of this collection? Have you tried any of these polishes and had a different experience? 

Disclaimer: These products were provided to us by the company/PR for our honest consideration and review